Creating AWS S3 Bucket
Creating AWS S3 Bucket
By Jayant Sharma
So far we have discussed what is AWS S3 and what is the concept of Bucket in S3. If you haven,t read it, go to that link here. Now we are creating a bucket. You create an Amazon S3 bucket where you will store your objects.
Steps are as follows:
Step 1: Sign in to AWS Management Console.
Step 2: Under Services, select S3 service.
Step 3: Click on Create Bucket button.
Step 4: Provide a unique bucket name. Note that the name doesn't contain upper case letters. Then select your service region, and then click next.
Step 5: Now this is an important step as it contains some important concepts to be remembered. Right now, click next as we can configure this later.
Step 6: Permissions can be configured later. Click on next.
This is a review page so that you can edit any step again. Click next.
Here are your buckets you have created. As you can see, on clicking the bucket, a small division opens. From this, you can configure any important feature.
Adding a file in a Bucket
Click on the properties from the division.
Go to Overview option:
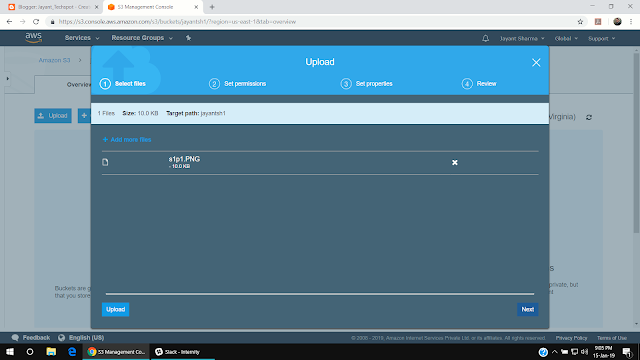
Now you will find various options. You can directly upload a file, or you can create a folder and upload in that. Lets choose Upload.
Here as you see, you find to options, upload and next. Upload can directly upload your file with default configuration setting. By clicking next, you can configure various options like permissions etc
Here you can change permissions for access. After configuring, click next.
Here you can select a storage class. It can be used according to your work. Click next.
Finally Upload your data.
So, we have successfully created a bucket and uploaded a file in it.


Comments
Post a Comment